During World War II, the British Commonwealth pulled together more than 10 million soldiers, forming one of the biggest military coalitions ever. These troops came from Britain, Canada, Australia, India, New Zealand, South Africa, and a bunch of smaller territories scattered across the globe.
People often picture World War II as a European affair, but that’s not really the case. Troops from every continent ended up fighting on European soil.
Commonwealth forces played a decisive role in Europe by providing the manpower and resources that Britain needed to defeat Nazi Germany. Without help from the dominions and colonies, Britain just couldn’t have kept up the long campaigns in North Africa, Italy, and Northwest Europe.
These troops brought more than just numbers. They brought unique skills, equipment, and new perspectives that really changed the way the war played out.
The story of Commonwealth forces in Europe shows how modern warfare leans heavily on global teamwork. Canadian pilots defended British skies, and Indian soldiers fought in Italy. This multinational effort shaped military strategy, political ties, and the path of the British Empire moving forward.
If you want to understand how the Allies won, and how the war changed these countries forever, you have to look at their contributions.
Formation and Structure of the British Commonwealth Forces
The British Commonwealth shifted from being a colonial empire to a voluntary association of independent nations in the early 20th century. This change led to a unique military setup, where dominions ran their own forces but still coordinated with Britain during big conflicts.
Origins of the British Commonwealth
The British Commonwealth came about because self-governing territories wanted more independence. Canada kicked things off by gaining dominion status in 1867. Australia and New Zealand followed in 1901 and 1907.
The Balfour Declaration of 1926 said dominions were equal partners with Britain, not subordinate. The Statute of Westminster in 1931 made this official.
Now, dominions could decide for themselves about war and peace. They no longer had to follow British military decisions automatically.
Each dominion built its own military command structure but kept ties to British military traditions.
This setup let former colonies stay connected to Britain culturally and militarily. It built a network of nations that shared military practices, training, and equipment standards.
Evolution from Empire to Commonwealth
Switching from empire to commonwealth changed how military forces worked together. Under the old empire system, colonial forces took orders directly from British commanders.
With the new system, each nation controlled its own military decisions.
Key changes included:
- Independent military command structures
- Voluntary participation in conflicts
- Shared training programs and standards
- Coordinated, but separate, supply chains
The Empire Air Training Scheme became the British Commonwealth Air Training Plan during WWII. This program trained aircrew from Britain, Canada, Australia, New Zealand, and South Africa.
Canada hosted most of the training because it was safer and had big airfields.
Military cooperation kept going through shared intelligence, joint training, and standardized equipment. Commonwealth nations often used British-designed weapons and stuck to British military doctrine. This made it easier to work together during wartime.
Dominions and Member Nations’ Military Hierarchies
Each Commonwealth country set up its own military command, but still kept links to British systems. The dominions created their own defense departments and leadership roles.
Canada set up the Department of National Defence in 1923. Canadian forces reported to their own ministers and parliament.
Australia formed its Department of Defence in 1901. Australian Imperial Force units stayed under Australian command during both world wars.
New Zealand created independent military commands but kept close ties with British training and equipment.
South Africa built its own defence force after becoming a dominion in 1910. South African troops joined Commonwealth operations by choice.
India stayed under direct British rule until 1947. Indian Army units served all over Europe, Africa, and Asia under British command.
This structure let these nations work together militarily while keeping their own sovereignty.
Mobilization and Composition of Commonwealth Forces in Europe
Commonwealth forces in Europe represented a huge mobilization, pulling in troops from across the British Empire. Over 8 million soldiers served in WWII, with big numbers from Canada and Australia, plus colonial territories like India and the West Indies.
Enlistment and Troop Contributions
The British Empire pulled together massive numbers for the European theater. Over 3 million soldiers from all over the Empire joined the British Army for the fight.
Major Contributors:
- Canada: Sent the largest single dominion force, with over 1 million personnel
- Australia: Sent significant forces, even with major Pacific commitments
- India: The Indian Army was the largest colonial force
- South Africa: Sent both white and black African units
- New Zealand: Sent forces that were huge compared to its population
India’s contribution was enormous. The Indian Army grew from 200,000 to over 2.5 million troops during the war. Indian soldiers served heavily in Europe, especially in Italy and the Mediterranean.
Smaller territories joined in too. Jamaica and other West Indies colonies sent people for specialized units. Ceylon provided military personnel and strategic bases.
Recruitment looked different in each place, shaped by local populations and politics.
Coordination and Training
Commonwealth forces needed a lot of coordination to work well in Europe. The British Army set up training centers in dominion territories to standardize how things were done.
Training locations included:
- Canada: Big training centers for Commonwealth air crews
- Australia: Specialized desert warfare training
- India: Infantry and mountain warfare schools
- South Africa: Air training programs
Language barriers got in the way sometimes. Indian troops often had to learn English. West Indies personnel had to fit into British command structures.
Standardizing equipment mattered a lot. Commonwealth forces used British weapons and vehicles to keep supply chains running smoothly. This meant they relied on British manufacturing, but it made things simpler on the battlefield.
Command integration looked different depending on the theater. Some Commonwealth units kept their national identity, while others blended into British formations.
Diversity of Personnel
Commonwealth forces brought a level of ethnic and cultural diversity you didn’t see elsewhere. Indian soldiers made up the largest non-white contribution to the war.
The Indian Army included many groups—Sikhs, Gurkhas, Punjabis, Marathas—all serving in Europe. Their mountain warfare skills were especially useful in Italy.
African contributions mostly came through South African units. Both white South Africans and black Africans served, though often in separate formations.
Caribbean personnel from Jamaica and the West Indies worked in support and specialized units. Many handled logistics and technical jobs.
Indigenous people from Canada, Australia, and New Zealand signed up too, even though they faced discrimination back home. Their tracking and reconnaissance skills gave their units an edge.
This diversity brought both strengths and challenges. Different cultural practices needed respect, but discipline still had to be maintained.
Role of Colonial and Dominion Forces
Dominion forces had more autonomy than colonial troops. Canada, Australia, and South Africa ran their own command structures but still coordinated with British strategy.
The Indian Army was the biggest colonial force. Indian troops fought in North Africa, Italy, and other European theaters. Their performance upended a lot of the era’s racial stereotypes.
Colonial forces often filled specialized roles. West Indies personnel handled technical jobs that needed specific skills. Their work went beyond just fighting on the front lines.
Dominion air forces played a big part too. The Royal Canadian Air Force and Royal Australian Air Force sent pilots and aircrew for European missions. Many trained in Canada through the Commonwealth Air Training Plan.
Economic contributions were just as important. Dominions sent materials, food, and manufacturing support. Colonial territories supplied raw materials the war effort couldn’t do without.
These forces showed that the Empire could call on its global reach when European conflicts demanded it.
Key Military Campaigns Involving Commonwealth Forces
Commonwealth forces fought side by side with British troops in three major campaigns in Europe and the Mediterranean that really shaped how the war turned out.
The Royal Air Force brought in pilots from all over the dominions during the Battle of Britain. Australian, Canadian, South African, and New Zealand troops played key roles in North Africa and Italy.
Battle of Britain and Air Operations
Fighter Command leaned hard on Commonwealth pilots during the summer of 1940. Air Chief Marshal Sir Hugh Dowding led a force that included lots of pilots from Canada, Australia, New Zealand, and South Africa.
Polish squadrons also joined in under RAF command. These pilots brought valuable combat experience from fighting in Poland.
The Royal Canadian Air Force sent hundreds of pilots to Fighter Command. Canadian pilots flew Hurricanes and Spitfires from British airfields during the toughest months between July and October 1940.
Australian and New Zealand pilots flew with RAF squadrons throughout the battle. Many trained at home before heading to Britain.
The Royal Australian Air Force kept several squadrons operating from British bases. They flew both fighter and bomber missions over occupied Europe.
Commonwealth air forces didn’t stop after the Battle of Britain. They joined bombing campaigns over Germany and supported ground operations in different theaters.
North African Campaign
The North African desert became a real test for Commonwealth forces from 1940 to 1943. Australian, South African, Canadian, and New Zealand troops teamed up with British units to fight German and Italian forces.
The Siege of Tobruk in 1941 showed just how tough Commonwealth troops could be. Australian forces held the port city for 241 days against Rommel’s Afrika Korps.
South African and New Zealand troops fought in multiple desert battles. They learned to deal with harsh conditions and the fast, mobile fighting that defined the campaign.
The Battle of El Alamein in October 1942 was the big turning point. Commonwealth forces under Montgomery beat Rommel’s army and started the final push toward Tunisia.
The East African Campaign had Commonwealth forces clear out Italian forces from Ethiopia and Somalia. South African, British, and Indian troops worked together to secure the region by 1941.
Commonwealth naval forces kept Mediterranean supply lines open. The Royal Canadian Navy and other dominion ships helped make sure equipment and reinforcements got to North African ports.
Italian Campaign and the Advance into Europe
Commonwealth forces landed in Sicily and mainland Italy starting in 1943. Canadian, Australian, New Zealand, and South African troops fought through tough mountain terrain against determined German defenders.
The Italian Campaign challenged Commonwealth forces with terrain totally different from North Africa. Troops faced German positions in mountains that made defense easier.
Canadian forces helped break through German lines. The 1st Canadian Corps fought at Ortona and in other key battles that opened the way to Rome.
New Zealand forces made a name for themselves in several Italian battles. The 2nd New Zealand Division stood out for their mountain warfare skills.
Commonwealth air forces gave close support to ground troops across Italy. RAAF squadrons flew tactical missions from Italian airfields as the Allies advanced north.
The push through Italy took a lot of coordination between Commonwealth and American units. That teamwork carried on as the war neared its end in 1945.
Naval and Air Force Operations: Strategic Significance
Commonwealth naval and air forces made up the backbone of Allied operations in European waters. The Royal Navy worked closely with dominion navies, while Commonwealth air forces formed specialized squadrons that were vital to success in Europe.
Royal Navy and Allied Naval Cooperation
The Royal Navy led Atlantic and North Sea operations during the war. Ships from the Royal Canadian Navy joined convoy escort groups that kept supply lines to Britain open.
Canadian corvettes and destroyers sailed from British ports. These ships were crucial during the Battle of the Atlantic from 1940 to 1943. The Royal Canadian Navy sent more than 400 ships for European missions.
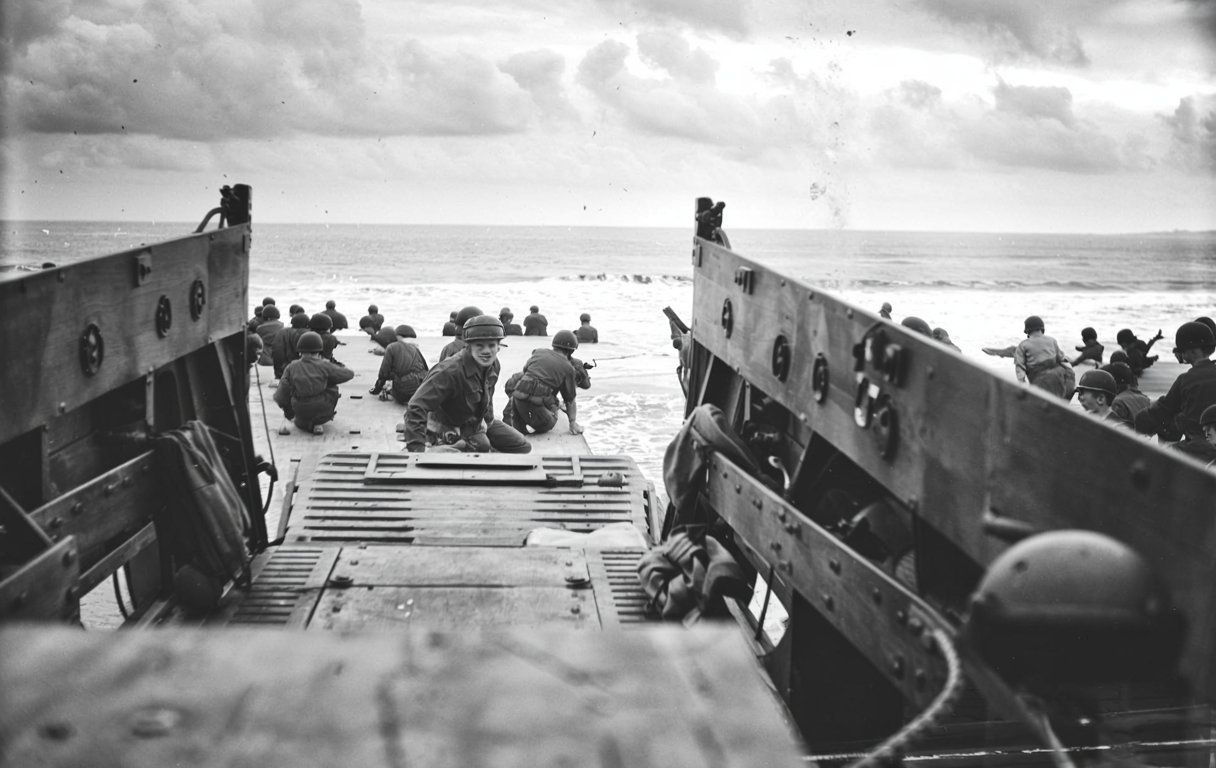
Joint task forces mixed British and Commonwealth ships for big operations. During the D-Day landings, Canadian destroyers provided bombardment support alongside Royal Navy battleships. Australian cruisers joined Mediterranean campaigns under British command.
Commonwealth naval cooperation wasn’t just about ships. Canadian and Australian sailors served on Royal Navy vessels. Training programs sent officers between Commonwealth navies to boost coordination.
Role of Commonwealth Air Forces
The Royal Air Force brought Commonwealth air forces into both Fighter Command and Bomber Command. Australian, Canadian, and South African pilots started flying missions from British airfields in 1940.
The Royal Australian Air Force set up No. 10 Squadron at RAF Leeming that same year. This squadron flew Sunderland flying boats on anti-submarine patrols over the North Sea.
RAAF personnel also joined RAF squadrons as individual aircrew. Commonwealth bomber crews took part in strategic bombing campaigns over Germany.
Canadian aircrew made up nearly 25% of Bomber Command personnel by 1943. Australian pilots flew heavy bombers like Lancasters and Halifaxes.
Commonwealth pilots joined fighter operations in the Battle of Britain. No. 1 Squadron RCAF flew Hurricanes out of RAF Northolt during 1940.
These pilots defended London during the worst of the German air attacks.
Notable Squadrons and Joint Operations
Polish squadrons under RAF command really made a mark in combat. No. 303 Polish Fighter Squadron shot down 126 German aircraft during the Battle of Britain.
These pilots had experience from fighting the German invasion back in 1939.
Key Commonwealth Squadrons:
- No. 242 Squadron RAF (Canadian personnel)
- No. 452 Squadron RAAF (Spitfire operations)
- No. 331 Squadron (Norwegian pilots)
Czechoslovakian airmen formed No. 310, 312, and 313 Squadrons under RAF command. These units flew from British bases and supported missions over France and Belgium.
Czech pilots often handled reconnaissance before D-Day.
The Thousand Bomber Raids of 1942 saw aircraft from several Commonwealth nations join in. Canadian, Australian, and Polish crews took part in raids against Cologne and Essen.
These big operations showed how much Commonwealth air power mattered.
Free French and Belgian pilots joined Commonwealth squadrons after their countries fell. No. 349 Squadron included Belgian pilots flying with British aircrew.
These mixed-nationality units operated from bases all over England and Scotland.
Logistical, Industrial, and Economic Support
Commonwealth nations changed their economies completely to support the war in Europe. Raw materials came from colonies all over the world, while factories in Canada, India, and other dominions mass-produced weapons and supplies.
Supply of Raw Materials and Resources
The British Empire’s huge territories sent over the materials the Allies needed to keep fighting. India supplied rubber, jute, and tea, while African colonies shipped copper and zinc.
Canada sent timber, nickel, and aluminum across the Atlantic.
Commonwealth merchant seamen risked their lives moving these goods. Ships from Africa, the West Indies, and Asia carried vital supplies through dangerous waters.
German U-boats sank hundreds of ships, but somehow the flow of materials kept going.
The empire’s food production fed both civilians and soldiers. India became a major supplier of rice and wheat.
Australia and New Zealand sent meat and dairy products. These countries often went without so Europe could get what it needed.
Strategic materials like oil came from Middle Eastern territories. Burma sent tin until Japanese forces captured it in 1942.
South African gold mines funded weapon purchases from neutral countries.
Industrial Production and War Material
Commonwealth factories quickly switched from peacetime goods to military equipment. Canada built thousands of aircraft, ships, and vehicles for the European theater.
Its factories made over 16,000 aircraft during the war.
Indian shipyards repaired Allied vessels and built new ones. Textile mills in India produced uniforms and parachutes.
Indian steel became tanks and artillery shells used across Europe.
Australia manufactured ammunition and military vehicles. Its factories ran around the clock to keep up.
Women took over many factory jobs as men left for combat.
| Country | Key Production |
|---|---|
| Canada | Aircraft, ships, vehicles |
| India | Textiles, steel, ammunition |
| Australia | Munitions, military vehicles |
| South Africa | Military equipment, gold |
The United States lend-lease program brought in much-needed funds. American money and materials allowed Commonwealth factories to ramp up fast.
Financial Aid and Economic Impact
Britain spent massive amounts supporting its European allies and resistance groups. The country hosted governments-in-exile in London and paid for their operations.
This financial burden almost bankrupted the empire.
Commonwealth nations contributed billions of pounds to the war effort. Canada provided big loans to Britain.
Australia and New Zealand sent money and resources without expecting repayment.
By 1942, the war had destroyed Britain’s financial independence. Military defeats in Europe and Asia drained the treasury.
The country owed huge debts to the United States and Commonwealth partners.
India faced terrible economic hardship at this time. Two million Bengalis died of starvation when crop failures and disrupted transport links hit the region.
The colonial government put military supplies ahead of civilian food aid.
Workers from across the empire arrived in Britain after the war to help rebuild damaged cities and infrastructure. This migration changed British society for good.
Aftermath and Political Legacy
The end of the war brought huge changes across the British Commonwealth. These changes shaped global politics for decades.
Independence movements grew stronger, and colonial relationships evolved into new partnerships between Britain and its former colonies.
Postwar Independence Movements
World War II weakened Britain’s grip on its colonies. Many Commonwealth nations had sent major military forces and resources to the war.
That participation gave colonial leaders more power to demand self-rule. Countries like India, which sent over 2 million troops, used their wartime contributions as leverage in independence talks.
Key independence milestones:
- India and Pakistan (1947)
- Ceylon, now Sri Lanka (1948)
- Ghana (1957)
- Nigeria (1960)
Colonies proved they could organize large military forces and run complex operations. Local commanders gained experience leading troops in major battles across Europe and other fronts.
These skills carried over to political movements after 1945. Former military officers often became independence leaders at home.
Changing Colonial Relationships
Britain couldn’t afford to keep large military garrisons across its empire anymore. The war drained British finances and cut its global military reach.
Commonwealth nations developed their own military traditions during the war. Canadian, Australian, and South African forces operated as distinct units, not just as extensions of British command.
This military independence shaped political relationships after the war. The old system of direct colonial rule faded, replaced by the modern Commonwealth of Nations.
New relationship features:
- Voluntary membership
- Shared democratic values
- Economic cooperation
- Cultural ties without political control
Former colonies kept connections to Britain while gaining full sovereignty. The Queen stayed on as head of state in many countries, but only in a ceremonial way.
Enduring Influence of the Commonwealth Forces
Commonwealth nations kept working together militarily even after the war ended. They started holding joint training exercises, and shared defense agreements became pretty common.
Australia, New Zealand, and the United States signed the ANZUS pact, showing how former Commonwealth countries sometimes built new alliances. Britain and Canada actually helped found NATO, which is kind of a big deal.
Military traditions from the Commonwealth stuck around in a lot of places. You can still see British influence in officer training, ceremonial practices, and even how organizations are structured.
Lasting military connections:
- Shared training programs
- Officer exchanges
- Common equipment standards
- Joint peacekeeping operations
These days, the Commonwealth covers 56 nations and about a third of the world’s population. Many of their modern military institutions started with their World War II service next to British forces in Europe.
You can still spot the political legacy in parliamentary systems, legal frameworks, and diplomatic ties that grew out of that wartime cooperation.

